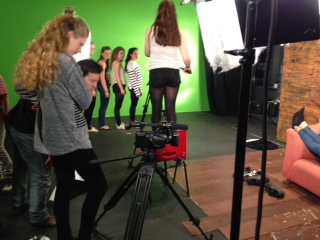
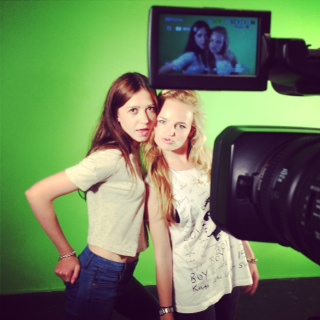
The different backgrounds were
-a green screen, where we can place an image ( but you need to stand at least a metre away from the green screen to illuminate the shadows.)
-a paper Mache wall that looked like a cave setting, where we filmed using a dolly and a camera
-a bed sit (a set of a room with a sofa,walls and windows)
 On the floor there were different
rolls for people to play, there was
 -the floor manager who made sure everything was in order and everyone was ready to film when the music started,
-there was the playback person who played and paused the music, -the camera man who kept zooming in, sharpening and focusing on image
-the people in the video acting and singing and
-the director of the music video who told people what to do in their group.
My group started on the green screen. Xenia and Alicia were on set doing the singing and dancing infront of the camera, Ivo was camera man, Liv Ellie and I were directing the video telling the girls what to do. This is where we learnt that you have to stand at least a metre infront of the screen.
We then moved onto the paper mache set up, we
did tracking shots on a dolly. Whoever the camera man was on this set had to sit on the dolly, with the camera. When putting the tracks down you have to make sure the lines are straight on the floor otherwise the camera will go wiggly which could make the shot shake and out of focus.the Bed Sit was a very different set up. We had three people singing infront of the camera, two on the sofa and one standing behind the sofa. This gave us a variety of shots and things to cut to and from and we just filmed this with a tripod (the same as the green screen) we didnt use a dolly
Once we had filmed all the footage we took it upstairs to the editing sweet and sorted it all out. We edited using the software 'Final Cut Pro.'
1. We had to seperate the clips into folders with the different sets
2. Then we selected a clip and dragged it down to the time line
3. At the same time you drag the song down to the time line, and lock it so you cant accidently delete it
4. Then we deleted the clip and its backing noise from the shoot
5. Found the clip we wanted to start with and we lip synced it by the beginning 3 beats of the song. On the clip we liked we would mark it on exactly the 3rd beat on the sound track, then when we found the 3rd beat on the clip and clicked 'I' for In and dragged the clip down to the time line, then you check if they are on time. Once they are and you are happy with it,you delete the audio track from the clip.
6. Once we had done this with about 4 clips, we then started to edit it all together by clicking 'B' for blade to cut up the clip when we wanted to cut to a different clips and 'A' when we wanted the Arrows back to move the clips. With this you can move the clip back with the clip still being in sync with the music so it didn't too complicated!
The reason we did this activity was because we are making music videos soon, so we need to learn how to edit the footage with the music and the lips in synch-which by the way, is quite difficult!!

No comments:
Post a Comment